LtaGo’s live tracking feature lets pilots, crew, and chase vehicles share their real-time GPS position with each other during a competition or flight. This guide covers everything you need to get connected — both through the LtaGo web app and the QGIS plugin.
Part 1: Web App Setup
Step 1: Log In
Visit web.ltago.app and log in with your WordPress account using the Log in with WordPress button. You’ll be redirected back to the LtaGo dashboard once authenticated.
Step 2: Set Your Display Name
Navigate to the Tracking page from the top navigation bar. In the My Display Name panel on the left, enter the name you want others to see on the map — for example, your callsign or role (Pilot, Chase 1, etc.). Click the checkmark to save.
Step 3: Share Your Location via Invite Link
To let someone see your live location, click Generate Invite Link in the Invite Links panel. A link will be generated that is valid for 48 hours and can only be used once. Copy it and send it to the person you want to share with — they’ll open it in their browser to accept.
Once someone accepts your invite, they appear under People Tracking Me on the Tracking page. You can revoke access at any time using the red × button next to their name.
Step 4: Join a Group (Optional)
Groups let a team share locations with each other without exchanging individual invite links. Once you join, all group members’ locations are automatically visible to each other on the live map.
To create your own group, click + New in the Groups panel and give it a name. You can then invite others to join using a group invite link.
Step 5: View the Live Map
Click Live in the navigation bar to open the full-screen live tracking map. All users who have shared their location with you appear as labelled markers. The left sidebar shows a list of tracked users organised by group, with their current signal status. Use the checkboxes to toggle visibility of individual users on the map.
Part 2: QGIS Plugin Setup
The LtaGo QGIS plugin sends your GPS position from QGIS directly to the live tracking server, so your location appears on everyone else’s map in real time. It requires an API key generated from the LtaGo web app.
Step 1: Generate an API Key
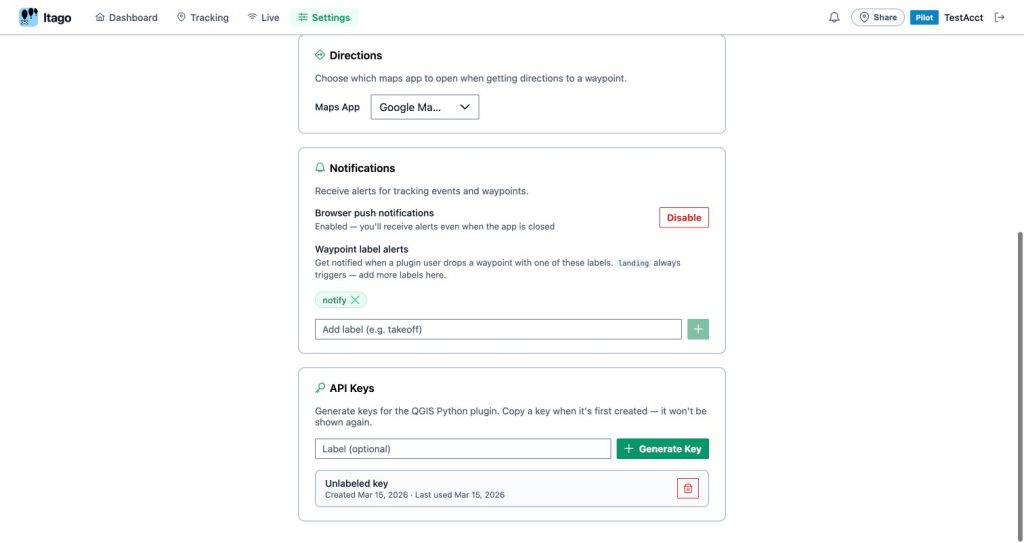
In the LtaGo web app, go to Settings and scroll down to the API Keys section. Optionally enter a label (e.g. “My Laptop”), then click + Generate Key. Copy the key immediately — it will only be shown once.
Step 2: Configure the Plugin
In QGIS, click the gear icon (⚙) in the LtaGo toolbar to open Settings, then select the Tracking tab. Fill in the following fields:
| Setting | Value |
|---|---|
| Server URL | wss://ltago.app/ws |
| API Key | Paste the key you copied from the web app |
| Send Interval (s) | How often to send your location in seconds (default: 2) |
Click OK to save.
Step 3: Open the Live Tracking Panel
Click the person icon in the LtaGo toolbar and select Live Tracking from the menu. The Live Tracking panel will open, showing a table of tracked users and a status indicator at the top.
Step 4: Connect
Click the Connect button. The status indicator will turn green and show Connected once the plugin establishes a WebSocket connection to the server. Your GPS position will then be sent to the server every 2 seconds (or whatever interval you configured).
Other tracked users will appear as rows in the table, showing their name, altitude, speed, heading, and time of last update. Enable Show on Map to render their positions directly on your QGIS map canvas.
Troubleshooting
- Status stays “Disconnected” — double-check the Server URL (must start with
wss://) and that your API key was copied correctly. - No GPS data sent — make sure QGIS has an active GPS connection (check the GPS toolbar). The plugin sends your position only when a GPS fix is available.
- You don’t appear on others’ maps — confirm you accepted each other’s invite links, or that you’re in the same group. The API key alone does not grant visibility; you still need tracking permission set up in the web app.